Showing posts with label snack. Show all posts

Wednesday, March 12, 2014

Yogurt with Nut Butter


Yogurt with Nut Butter

I have a new lunch obsession.  The title really says it all.  Yogurt with nut butter.  Sound weird?  I thought it did at first too.  But then I remembered how much I like peanut butter on everything else.  I've put peanut on ice cream/frozen yogurt and in smoothies, so why not just directly on to plain yogurt?  Silly me for never having thought of this before.  This post on the kitchn was my inspiration.  Though I haven't tried the graham crackers like they did, I do think the crunch would be nice. 

Yogurt with Nut Butter

I've been having this along with some cut up veggies for lunch for the past couple of weeks.  The peanut butter makes it taste rich and amazing.  The great thing is that it is VERY filling, but also very nutritious.  It has lots of protein and healthy fats, but not too many carbs. It is quick to prepare and easy to take on the go in a little container.  

Try it!  Especially if you are in need of new lunch ideas.

I should mention that when I first told Mark about yogurt with peanut butter on it I think he was skeptical, but he did try it and has since had it multiple times as a lunch addition/snack.  He's not one to have yogurt plain, but throw some peanut butter on it and he's a big fan. :)

Yogurt with Nut Butter


Yogurt with Nut Butter
Here is my "formula"- play around with it!  

Yogurt with Nut ButterINGREDIENTS:
  • 1 cup plain nonfat greek yogurt 
  • 1-2 tablespoons nut butter (peanut butter or almond butter-- peanut butter will have a stronger flavor)
  • drizzle of honey or small spoonful of jam

DIRECTIONS:
1) Put all the ingredients in a bowl and stir to combine.
2) Eat!

Or... if you want to make it look fancy, you can microwave the peanut butter in a small dish first for about 1 minute to make it easier to pour.  That's what I did for the first photo.  But usually, I just stir everything together in the bowl or container I eat it out of.


Sunday, May 19, 2013

Soft Pretzels

Soft Pretzels

I love soft pretzels and these are fantastic.  I first made soft pretzels at home a few years ago, and have made them many times since then.  I've tried a couple of recipes and these are a combination of the best aspects of each of those recipes, plus the addition of whole wheat flour.   What's great about these pretzels (besides their taste!) is that while they are made with yeast, they don't have to rise much.   Start to finish these are done in under two hours.

Have you ever wondered what makes a soft pretzel taste like a soft pretzel?  The chewy texture comes from the fact that soft pretzels are boiled like bagels before being baked in the oven.  The pretzel taste comes from the fact that baking soda is mixed in with the boiling water.  Salt sprinkled on top helps too, though these are delicious even without the salt on top.

This dough has no fat in it.  The finished pretzels are brushed with a tad of butter which makes a huge difference to the overall eating experience.  I strongly recommend the butter finish!  If you've never considered making your own soft pretzels, give this recipe a try.  These are quick and delicious, and actually not any less healthy than a typical piece of bread.

Soft Pretzels

Soft Pretzels

yield: 12 pretzels

INGREDIENTS:
  • 2 cups white whole wheat flour
  • 3 cups all purpose flour + additional for sprinkling
  • 1 3/4 - 2 cups lukewarm water
  • 2 teaspoons salt
  • 2 teaspoons sugar
  • 2 1/4 teaspoons instant yeast
  • 2/3 cup baking soda (yes, 2/3 CUP)
  • 10 cups water
  • coarse salt, for sprinkling (optional)
  • 1 tablespoon butter, melted

DIRECTIONS:

1) Combine flours, 1 3/4 cups lukewarm water, salt, sugar, and yeast.  Mix and knead for 5 minutes, ideally in a stand mixer with a dough hook.  The dough should be slack and sticky.  If it is dry, add additional water.

2)  Sprinkle additional flour all over the dough to prevent it from sticking and place the dough in a bag.  Allow the dough to rest for 30 minutes.

Soft Pretzels

3)  While the dough is resting, combine baking soda and water in a large pot.  Set aside.  Preheat the oven to 450F.  Line two baking sheets with parchment or baking mats.

4)  Once the dough is done resting, start to bring the baking soda and water to a boil.  Remove the dough and divide it into 12 equal portions (about 3 ounces each).  Roll each into a rope and twist into a pretzel shape.  Place shaped pretzels onto the lined baking sheets, 6 pretzels per sheet.  

5)  Once the baking soda water is boiling, add three pretzels and cook for one minute.  Remove with a slotted spoon and return to the baking sheet.  Sprinkle with coarse salt if desired.  Repeat with remaining pretzels.  

Soft Pretzels
Upper pretzels are pre-boiling and lower pretzels are post-boiling.
6)  Once the oven has preheated, bake pretzels for 10-12 minutes until golden brown.   I bake one tray at a time, but do what works best for your oven.

Soft Pretzels
Before the butter finish!
7)  Remove pretzels from the oven and brush with melted butter.  Serve warm.  Store leftover pretzels in the freezer and defrost/toast when ready to serve.

(recipe adapted from King Arthur Flour and Annie's Eats) 

Saturday, February 9, 2013

Apple Banana Muffins

Apple and Banana Muffins

I know I just recently posted a muffin recipe, but the lemon poppy seed muffins are more of a dessert, and these muffins are healthy enough to eat daily.  I've made them a few times now and I've been excited to share this great find with you!  

Right now, two of my classes each week are between 11am and 1:50pm.  Not exactly ideal for eating lunch.  I usually try to bring a few small food items that are quick to snack on, and these muffins have been perfect.  They are super flavorful from all of the cinnamon, nutmeg, allspice, and ginger spices as well as the apples and bananas.  And yet... these muffins are remarkably healthy.  They have 100% whole wheat flour, flaxseed, apples, bananas, spices, and a bit of sugar in them.  What they don't have is butter, eggs, or oil.   They are vegan with very little added sugar.  They require two ripe bananas, so they are a perfect thing to make instead of traditional banana bread with very ripe bananas.

While these muffins are an excellent snack on their own, they are also extra delicious with maple cinnamon almond butter (and I'm always looking for an excuse to eat that!).  They would also make a great breakfast along with some Greek yogurt.    I store these muffins in the freezer and grab them in the morning before I head out to work or other activities.  They really are a delicious quick snack, so they are a great thing to have in your freezer.  If you find yourself getting hungry in the afternoons, try packing one of these muffins for a snack!

Apple and Banana Muffins

Apple Banana Muffins

yield: 12 muffins

INGREDIENTS

For Roasted Apples:
  • 2 small apples, cubed (I used Macintosh)
  • 1/2 teaspoon cinnamon (I used ceylon cinnamon, but regular cinnamon would also work)
  • 2 tablespoons granulated sugar
Remaining Ingredients:
  • 2 tablespoons ground flaxseed + 6 tablespoons warm water (this is your "flax egg")
  • 1 1/2 cups white whole wheat flour (or traditional whole wheat)
  • 1/2 teaspoon baking soda
  • 2 teaspoons baking powder
  • 1/2 teaspoon salt
  • 1 teaspoon cinnamon (I used ceylon cinnamon, but regular cinnamon would also work)
  • 1/4 teaspoon ground nutmeg
  • 1/4 teaspoon ground allspice
  • 1/4 teaspoon ground ginger
  • 2 small ripe bananas
  • 1/3 cup unsweetened applesauce (I used homemade, but you could use store bought)
  • 1/4 cup brown sugar

DIRECTIONS:

1)  Heat the oven to 425F.  Toss cubed apples (I left the skins on) with sugar and cinnamon and spread on a parchment lined baking sheet.  Once the oven has preheated, roast apples for 10 minutes.  This really enhances their flavor!  Once apples have been removed, reduce oven temperature to 350F.

2)  Prepare your flax egg:  In a small bowl, mix ground flaxseed and water and let sit for about 10 minutes.

3)  Meanwhile, combine dry ingredients (flour, baking soda, baking powder, salt, cinnamon, nutmeg, allspice, ginger) in a bowl and set aside.

4)  Combine bananas, applesauce, sugar and flax egg in another bowl.  Mash until combined and the banana is mixed in.  Then, stir in the roasted apples.

5)  Add wet ingredients to dry ingredients and mix just until combined.  The batter will be very thick, but shouldn't be dry (all of the flour should be able to be incorporated).  If you find it is too dry, add water a teaspoon at a time until all of the flour is incorporated.

6)  Grease a standard 12-cup muffin tin with cooking spray and spoon batter into the muffin holes, filling each about two-thirds  full.  Bake for 18-20 minutes in the 350F oven until a toothpick inserted in the center of a muffin comes out clean.  Let muffins cool in the pan for a few minutes, then transfer to a wire cooling rack to cool completely.  

7) Store airtight in the freezer and let thaw at room temperature (or defrost in the microwave) before serving.

(recipe slightly adapted from Live Faithfully)

Wednesday, February 6, 2013

Whole Wheat Naan

Whole Wheat Naan

I first enjoyed Naan at Indian restaurants, and I was so excited when I found this recipe for it so I could make it myself at home.   This version is whole wheat, and while it doesn't taste exactly like what you will get in a restaurant and is probably not completely traditional, it's really good!  Honestly in some ways I like it even better.  It's also not that hard to make, and takes less time compared to many breads because there is only one rise.  Even if you are not a confident bread maker, you should definitely try this recipe!  So how do you make this naan?  Combine all of the ingredients and knead for a few minutes (a mixer makes this super easy).  Then, let rise until doubled (about 1.5 hours):

Whole Wheat Naan
Whole Wheat Naan

Separate the dough into equal sized pieces.  I separate into 8 pieces for fairly large pieces of naan, but you could choose to make smaller naan if you want.  Roll each piece of dough into a rough oval (or any shape you want really!).  Make sure to roll it pretty thin.  Heat a griddle (or skillet) over medium high heat-- really let it heat up.  You want the griddle very hot so that air bubbles will appear in the naan when you cook it.  Cook the naan in batches for a couple of minutes on the first side and then another minute on the second side.

Whole Wheat Naan
Whole Wheat Naan

Once it's cooked, admire your naan and eat!   This naan contains whole wheat flour, Greek yogurt, olive oil, and an egg (as well as a few other small ingredients).  All of those ingredients help to make it an extremely hearty and filling bread.  It really has a lot of flavor on its own.   You can eat naan plain, or spread with nut butter.  Of course you can also eat it with lots of Indian foods.  I love having it with curries or other foods that have a sauce so you can dip the naan in.  Tomorrow I'll be sharing one of our favorite recipes to eat with naan!

Whole Wheat Naan

Don't you just wish you were eating some naan right now?  :)  If you have leftover naan, you can store it airtight in the freezer.  When ready to serve, defrost and toast to get crispy if desired.  Once you get the hang of this recipe, you can also experiment with adding other toppings to the naan such as garlic or cheese like you see in restaurants!  

Whole Wheat Naan

Whole Wheat Naan

yield: 8 large naan

INGREDIENTS:
  • 1/2 cup lukewarm water, plus additional as necessary (or--  if you make yogurt like me and have extra whey, use that instead of water!)
  • 2 teaspoons instant yeast
  • 1 teaspoon granulated sugar
  • 2 cups white whole wheat flour (or traditional whole wheat)
  • 1/2 cup all purpose flour
  • 1/2 teaspoon salt
  • 2 tablespoons olive oil + additional olive oil for cooking
  • 1/3 cup plain Greek yogurt (I used nonfat, but any kind is fine)
  • 1 large egg


DIRECTIONS:

1)  Combine all ingredients and knead to make a smooth dough, about 5 minutes.**

2) Transfer to a greased bowl, cover, and let rise in a warm spot until doubled, about 1.5 hours.  If your house is cold, turn your oven on for a couple of minutes while you are mixing up the ingredients and then shut it off.  This will give your dough a nice warm place to rise!

3)  Divide the dough into 8 pieces (or more if desired).

4)  Heat a griddle (or nonstick skillet) over medium-high heat.  Let it heat up for a few minutes.

5)  Roll the first few naan thinly into the desired shape.  Traditionally they are somewhat oval in shape.  My naan were about 7 inches by 4 inches. 

6)  Drizzle a teaspoon or so of olive oil on the griddle and let it heat up.  Transfer 1 or 2 naan to the griddle and cook until dark brown spots appear on the bottom, about 2 minutes.  You should see lots of air bubbles!  If you don't, your griddle might not be hot enough yet.  Flip the naan and cook on the other side for another minute, until dark brown.  It's okay if there are semi-burned spots!

7)  Repeat step 6 with the rest of the naan.

8)  Serve warm plain,  as a side to a meal, or any other way you want!  Store uneaten naan in the freezer and then defrost (and toast if desired) when ready to eat.

**Add additional water, a teaspoon at a time, as necessary.  The amount of water your naan needs will vary depending on the humidity, which has a lot to do with the season.  During the winter, your dough will need more water than during the summer.  This is true for all bread doughs!  The naan dough should be fairly soft, though definitely not wet.  You can see how it looked after I kneaded it in the "before rising" picture up at the top of this post. 

(recipe adapted from the little red house)

Saturday, February 2, 2013

Lemon Poppy Seed Muffins

Lemon Poppy Seed Muffins

Lemon poppy seed muffins are one of Mark's favorite foods.  When he was little, his dad used to take him out for muffins on Wednesday mornings and Mark's favorite was lemon poppy seed.  The bakery has long since closed, but these muffins still hold a special place in Mark's heart.  When Mark first told me this story a few years ago, he said that no lemon poppy seed muffins have lived up to his childhood memory.  Up for the cooking challenge, I did some research into "the best" lemon poppy seed muffins and made them.  The verdict was they were good, but not quite right.  Ever since then I've been reluctant to make them because I didn't want to make a muffin that was just "good".  But... over the past month or so Mark has reminded me more than once how much he likes lemon poppy seed muffins.  So, I finally took the hint, found another recipe, and made them.

Lemon Poppy Seed Muffins

The verdict?  They are good!  They are light and have a nice lemon flavor.  Mark says he likes them in particular because they are not too sweet.  In fact, the only difference he could think of between these muffins and the muffins from his youth are that they are not as big.  Not too bad!  These muffins really are very good (and unfortunately not healthy!), but more importantly they bring back great memories.

Lemon Poppy Seed Muffins

Today is Groundhog Day and apparently the groundhog predicts an early spring this year.  If you are already wishing for warmer days, these muffins just might do the trick.  Even though citrus season is in the winter, the light flavors remind me of the warmer climates that citrus comes from!  The first house Mark and I rented together had a lemon tree out back-- that is one of the food things I for sure miss about California!   (that and the Milk Pail Market... sigh...)

Lemon Poppy Seed Muffins

I found this recipe over at Annie's Eats and didn't modify it at all.  I used plain greek yogurt for the yogurt.  Head over there for the recipe for lemon poppy seed muffins.  And if you've never looked at her site before you should look around- she has a lot of great recipes and I've been reading her blog for years.  Hope you enjoy these muffins!

Also, here is a picture of the view of the river across the street from our living room window- not quite a lemon tree, but pretty awesome. :)

River View

Tuesday, January 1, 2013

Cinnamon Applesauce


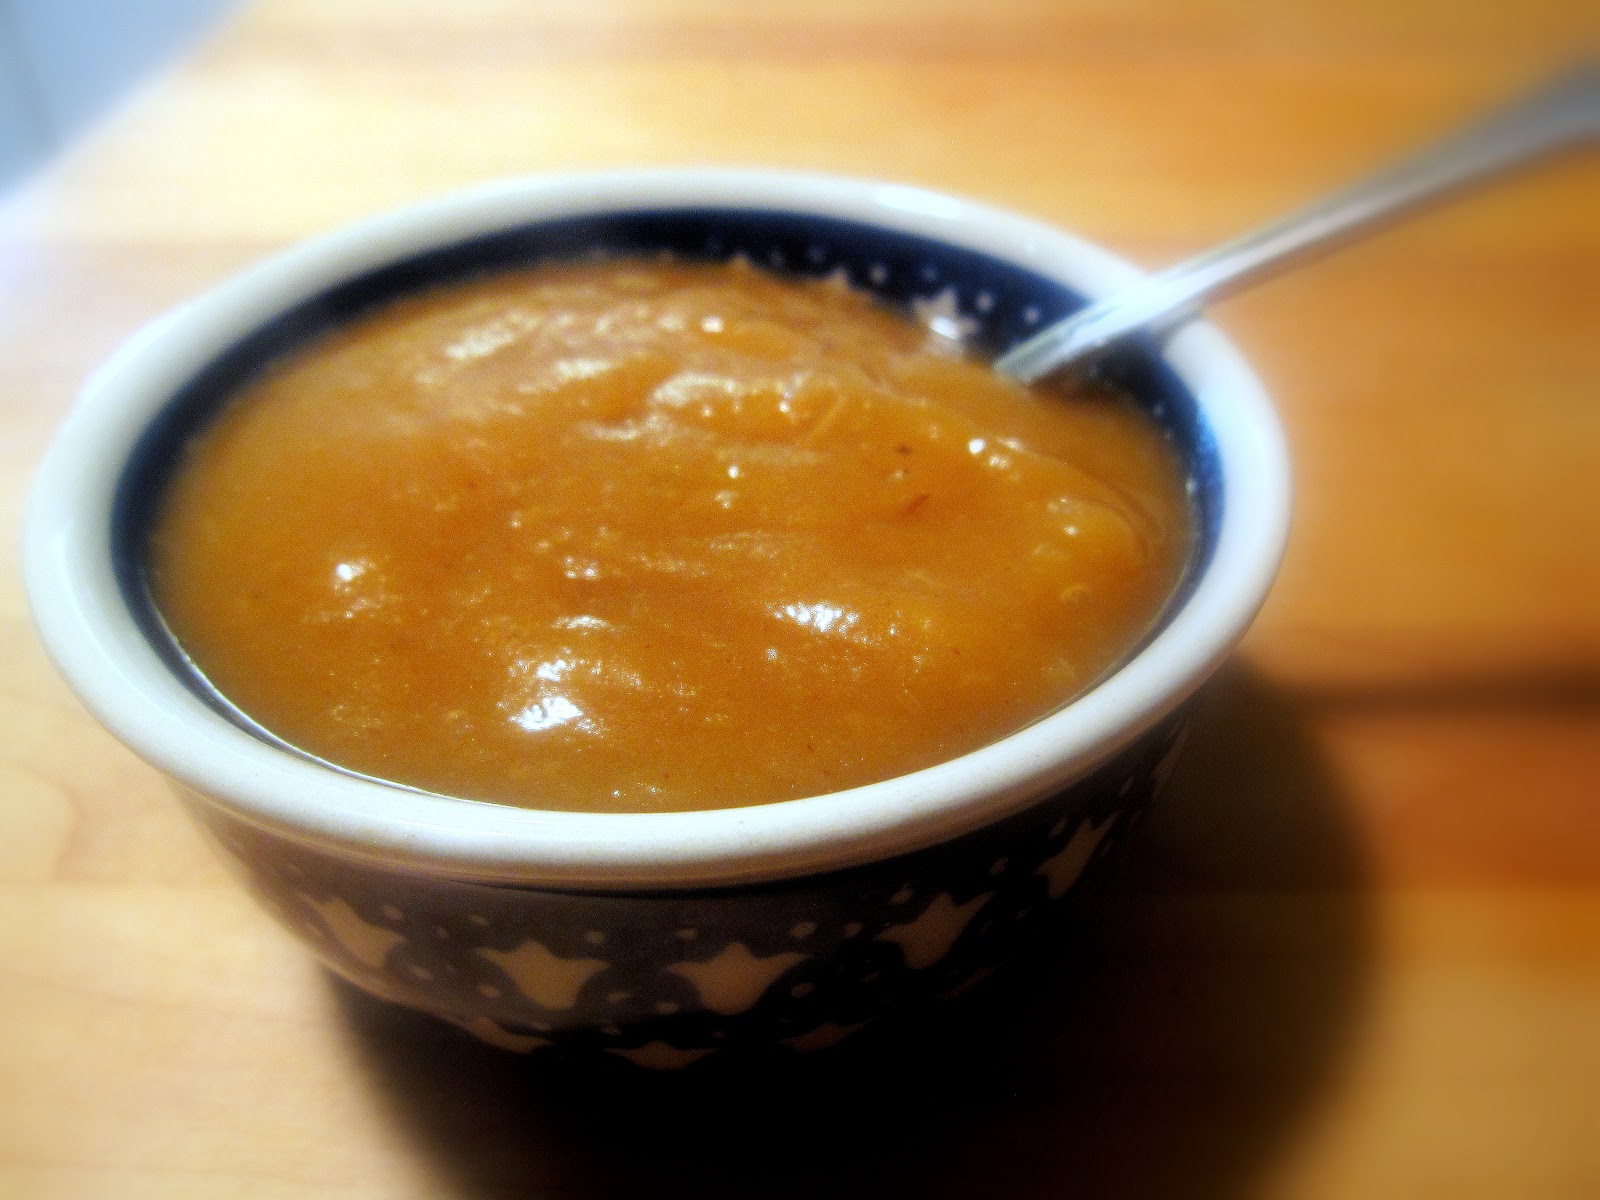
I grew up eating homemade applesauce, and today it is one of the foods I make almost weekly.  In my opinion, homemade applesauce is a million times better than the store bought variety.  Plus, it is much better for you and easy to make.  When I make applesauce I leave the skins on the apples so that none of the fiber or nutrients are lost.  I also don't add any sugar because I think it is completely unnecessary (and Mark agrees, so it's not just me!).  I personally like applesauce best when it is warm, so I recommend reheating it before eating.   Besides eating it plain, I love to have it for dessert with blueberries, or for lunch with a couple of spoonfuls of plain Greek yogurt on top (the mix of the warm applesauce and cold yogurt is really good!).

This recipe is actually more of a formula, as you can choose what types of apples to use.  I have used many different kinds depending on what looks good in the store.  The only apples I have not liked as applesauce are red delicious.  To make this applesauce, simply combine water and apples in a pot, turn up the heat, and stir occasionally.  The pictures below show what the applesauce will look like before cooking and after cooking:

You can leave the applesauce chunky after cooking, or blend to make it smooth.  I prefer it blended.  I'm not  always a huge fan of apples on their own, but I LOVE this applesauce.  I feel good knowing that I am essentially just eating plain apples (and cinnamon) in another form.

Cinnamon Applesauce

yield:  approximately 2 cups of applesauce per pound of apples

INGREDIENTS:
  • apples (most varieties will work... I currently like using McIntosh)
  • water (start with about 2/3 cup per pound of apples)
  • ceylon cinnamon or regular cinnamon (about 1/2 tsp per pound of apples, or to taste)
DIRECTIONS:

Sunday, December 30, 2012

Maple Cinnamon Almond Butter

Maple Cinnamon Almond Butter

I discovered this almond butter last year and it is AMAZING.  My favorite way to eat it is on these English muffins, but it is also great on celery, apples, or on a spoon!   I like plain almond butter, but this almond butter takes it to a new level.  The maple syrup makes it slightly sweet and the cinnamon enhances the flavor a lot.  

A food processor is absolutely essential if you want to make this.  If you don't have one, you could buy almond butter from the store and try mixing in some maple syrup and cinnamon, but it won't be exactly the same because the maple syrup won't be cooked in with the nuts.  The biggest trick with making any nut butter is that you have to be patient.  At first it won't seem like the nuts could ever turn into butter, but if you keep waiting (and scraping the sides of the bowl occasionally) it will eventually happen.  With my food processor it takes a minimum of 15 minutes before it's ready.  As you make the almond butter you will first notice that it turns into almond meal/flour.  After a while it will start to look like a dough ball.  After this stage, it will start to become more liquidity and then it will be ready!  This is what it should look like when you take it out of the food processor:

Maple Cinnamon Almond Butter

Almonds are lower in calories and fat than many nuts, and the fat that they do have is good fat.  They are a good source of protein, calcium, vitamin E, and magnesium.  They have also been shown to help lower cholesterol.  I love that I can feel good about having this almond butter!

Maple Cinnamon Almond Butter

Yield:  about 1.5 cups

INGREDIENTS:
  • 2 cups whole raw almonds
  • 1/4 cup maple syrup
  • 1-2 teaspoons of cinnamon
DIRECTIONS:

1) Preheat the oven to 325°F.  Line a baking sheet with a silicone baking mat or parchment paper.

2) In a medium bowl, combine the nuts and maple syrup.  Spread onto the prepared baking sheet.

3)  Roast the almonds in the preheated oven for about 12 minutes.  Check often to make sure they are not burning.  You want the maple syrup to be bubbling and the almonds to look slightly roasted.  

4)  Once you remove the almonds from the oven, immediately transfer them to the bowl of your food processor fitted with the normal blade.  Try to get as much of the maple syrup off of the baking mat as possible.

5)  Process the almonds until they turn into almond butter, scraping the sides of the bowl occasionally.  This could take up to 20 minutes.  Be patient!

6) Transfer to a container and store in the refrigerator.  Enjoy often! :)
(recipe slightly adapted from Edible Perspective)

Monday, December 17, 2012

Cheese and Veggie Quinoa Bites


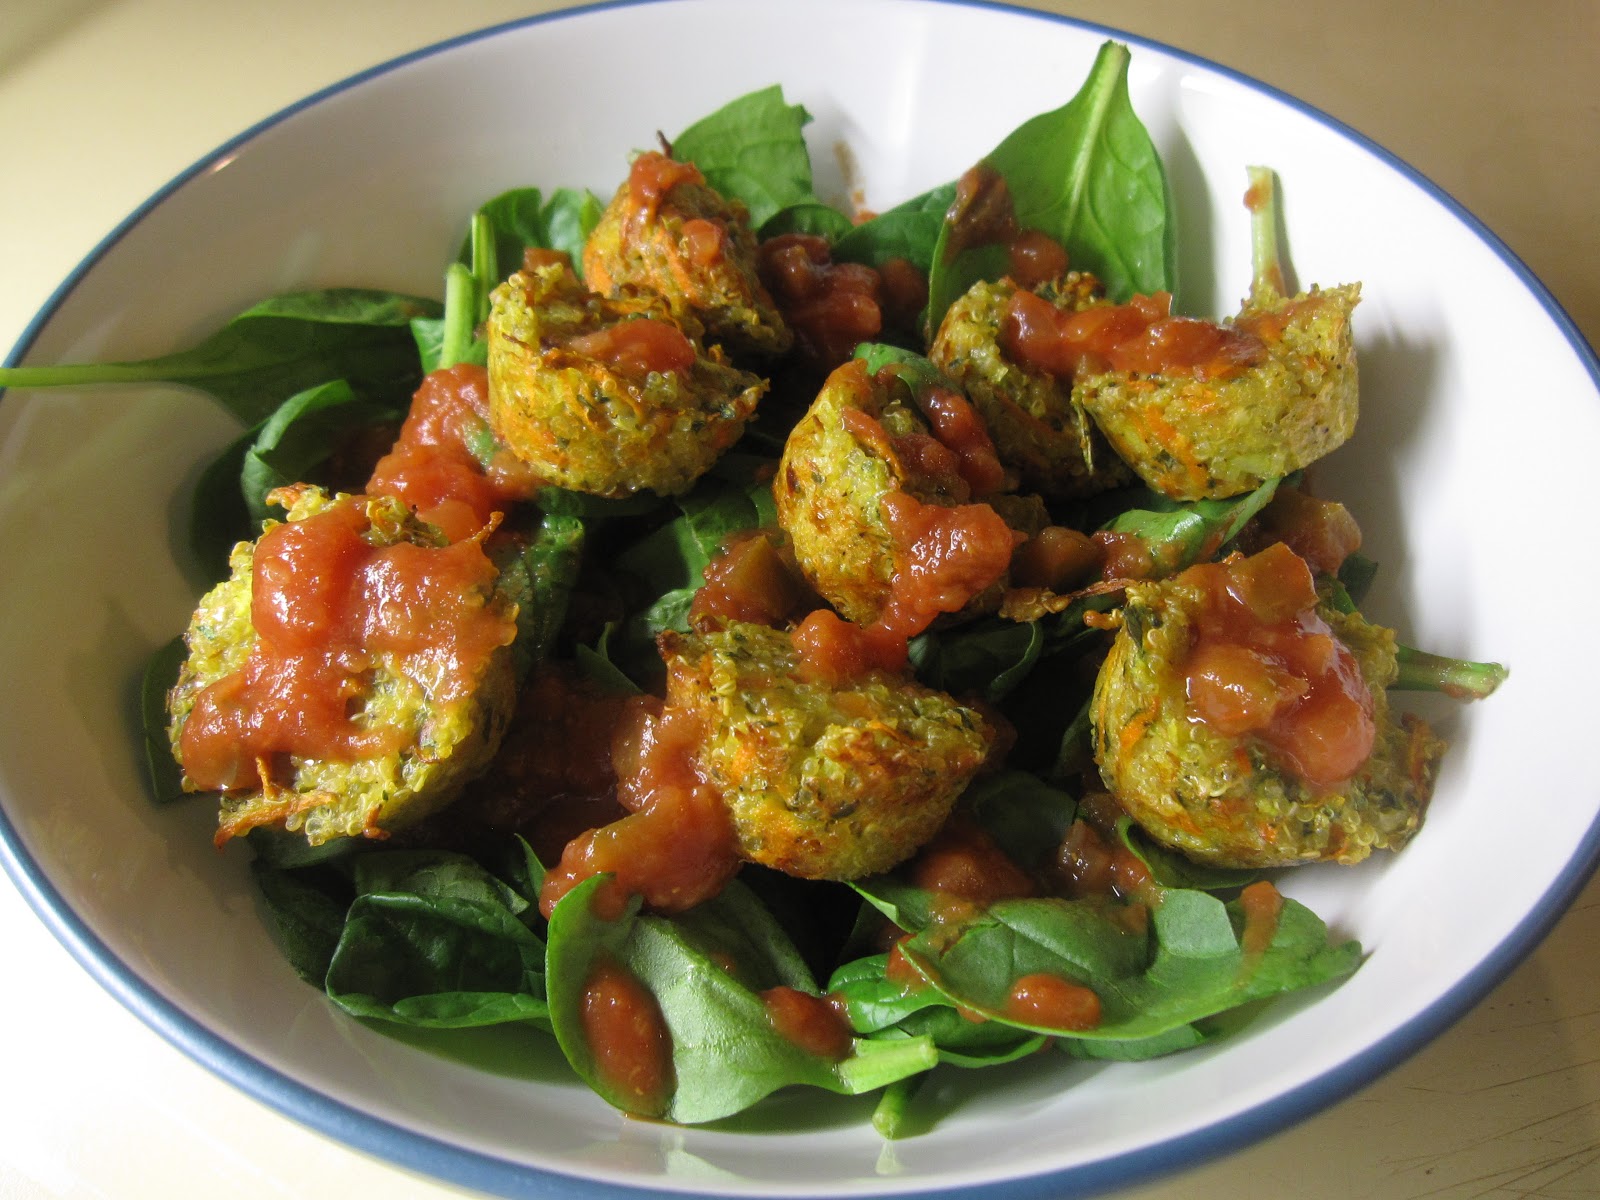
Do you agree that it can be really fun to dip foods?  The beauty of these little bites is that they are relatively healthy and great for dipping.  A healthy ranch-type dip is amazing.  Mark and I also like to eat these bites over a salad with dressing in order to up the veggies in the meal.  If you have a food processor, this meal comes together relatively quickly, and you can clean most of the dishes while the bites are baking.  The last piece of good news is that these bites make great leftovers, and while different, they aren't bad eaten cold!  You could make these on the weekend and have them as part of your lunch all week.  I will be bringing some of these as a travel snack this week when we head to California.
Cheese and Veggie Quinoa Bites

Yield: 36 bites (serves 4 for dinner)

INGREDIENTS:

  • 1 cup uncooked quinoa
  • 3 large eggs, lightly beaten
  • 3 carrots (about 12 ounces total)
  • 2 cups fresh baby spinach
  • 1/2 small yellow onion
  • 5 cloves of garlic
  • 6 ounces cheddar cheese, grated 
  • 3 tablespoons flour
  • 1/2 tsp black pepper
  • 1/2 tsp salt
  • 1/2 tsp of red pepper flakes (optional)

DIRECTIONS:


1)  Preheat your oven to 350°F.  Then, cook the quinoa:  In a small saucepan, combine the quinoa and 2 cups of water (you can also use part or all broth if you have any!).  Bring to a boil and then reduce heat to low.  Simmer, with the pan covered, for 15 minutes.  Remove from heat and let sit for 5 minutes. 


2)  Meanwhile, in the bowl of a food processor with the normal blade attachment, pulse the onion and garlic.  Once finely chopped, add in the spinach and do a couple more quick pulses.  Switch to the grater attachment and grate the carrots.

3)  In a large bowl, combine all of the ingredients from the food processor with the cooked quinoa, eggs, cheese, flour, and spices.  Mix thoroughly.

4)  Spray 2 mini muffin pans with cooking spray.  Using a cookie scoop or a spoon, fill each cup of the muffin pan with the mixture.  Press lightly with your fingers to make sure each cup is firmly packed.  Note: you will be making about 36 quinoa bites.

5)  Bake in the preheated oven for 20-25 minutes until golden brown.  

6)  Carefully remove the bites from the pans.  Serve with dipping sauce of choice, or over a salad with dressing.  


(recipe adapted from The Curvy Carrot)
Pin It button on image hover